I've always thought of skulls as kind of scary and too edgy for my taste, but lately, I've been pretty in love with them.
One day, I decided that skull studs were the coolest things in the world, so I asked my friend to order them for me from Etsy because I doubt my parents would be okay with them. When I got them, I was really surprised to see how big they were and I was just playing around with them when I got this marvelous idea to make rings out of them. Also, one morning, I was putting together my outfit and I couldn't find a pair of earrings that were edgy enough, so I made these stud earrings.
I was debating on whether or not I should post a tutorial on how to create these pieces of jewellery because they were so easy to make. Since you are reading this right now, you probably figured out that I decided to post the tutorial. It's super easy and I really hope that you'll try this out. Enjoy!
-♥-
First off - the stud earrings!
- Two skull studs - I prefer the brass ones because they have this kind of vintage-y and edgier feel to them that I really like. I got mine from this shop called ForestEra on Etsy. Here are the exact ones that I got and they're really cheap - just two bucks!
- A hot glue gun and glue stick (for the glue gun)
- Small stud earrings - Mine are just an old pair from back when I thought having little mini ketchup bottles on my ears was cool. You could just go and get a cheap pair from Forever 21 or something if you don't already own a pair.
The first thing you're going to want to do is plug in your hot glue gun so that it'll warm up while you're getting your studs ready.
Then, get out your studs. Be sure to pick two studs that look somewhat similar because I find that the brass ones tend to differ in colour, which is quite odd. Your studs probably have prongs on them and if they do, just fold them in to the inside of your stud as far as you can.
Now, get out your stud earrings and pull of the little thing that keeps the earring on your ear.
Now all that's left to do is wait until the glue dries. When it's hot, it's (obviously) clear, so you'll know when it dries when it turns a more opaque, almost white colour. Just a quick tip for any of you wanting to try this out - the hot glue makes the stud extremely hot, so don't touch the stud until the glue's completely dry.
There you go - your skull stud earrings are done! Wasn't that so easy?
-♥-
Now... the skull wire ring!
WHAT YOU'LL NEED
- One skull stud - Again, I used the same studs that I got from that Etsy store.
- 2 inches or 5 cm of 20 gauge wire - It's best to use the same colour as your stud, but all that I had laying around was gold wire, so that's what I used. Also, if your ring size is bigger than a 6, you might want to cut off a bit more wire just in case.
- A hot glue gun and glue sticks
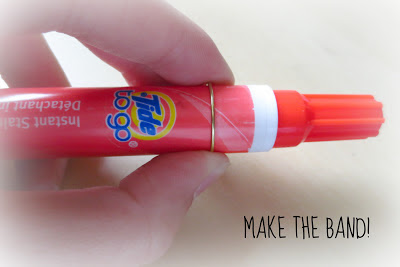
- A marker - Be sure to pick one that is about the same size as your finger.
Once again, start off by plugging in your hot glue gun to let it warm up while you prepare your skull stud.
Push the prongs of your stud towards the center of the stud to pretty much get rid of them.
I hope that you guys enjoyed the two tutorials and that you'll try one (or both) of them out. Please leave me a comment down below if you do!
Thank you so much for reading!


Whether you possess a holistic or technical point of view, there is without doubt that countless people have benefited from the therapeutic properties of crystals. Crystal jewelry for bridesmaids can mean anything from earring to necklaces and everything in between. crystal bracelet is affordably priced and therefore easy to replace; you don't have to be concerned that you will lose or break crystal jewelry as you would with diamonds or other precious gems. So, Crystal gifts is much in demand nowadays.
ReplyDeleteThanks for sharing!
Delete- Juliana
I would like to thank you for the efforts you have made in writing this article. I am hoping the same best work from you in the future as well.. online rings
ReplyDeleteTo wear slave studs, first put on the plainer hoop. Join the lower stud of the slave hoops, being mindful so as not to make new knot. Get the sleeve or second stud, and pull it delicately up toward the highest point of your ear ligament.ear cuff
ReplyDeleter6a78j0h46 o0h24c6n52 f4y58p5i30 f6a76i9j99 w2a48w3c52 k5p75x7q50
ReplyDelete