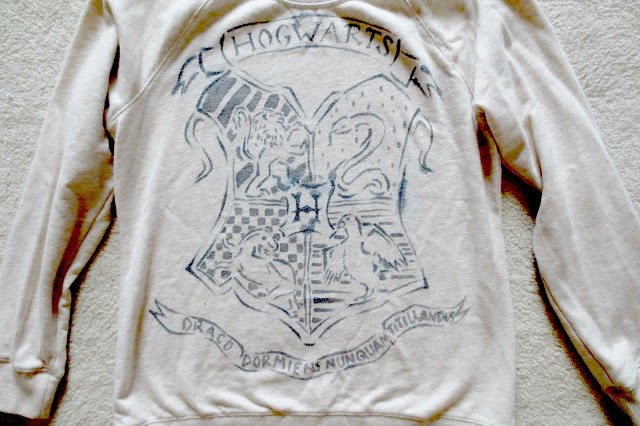
Hi there! The moment I saw this photo of a Harry Potter sweater on Pinterest, I knew that I had to make it for my friend's birthday. Because it was just a photo, I decided to post a DIY tutorial on it (which is so long overdue and for that, I'm sorry), so here it is!
P. S. The blog url is going to change to stylegeneris.blogspot.com on Monday, September 9th. If you want to learn more about the change, check out my blog post here.
P. S. The blog url is going to change to stylegeneris.blogspot.com on Monday, September 9th. If you want to learn more about the change, check out my blog post here.
WHAT YOU'LL NEED
- A sweater - Make sure that it's a plain sweater!
- Cardboard - The cardboard is to seperate the two layers of fabric (front and back) so the paint doesn't bleed through, so pick a piece of cardboard that's big enough.
- Black fabric paint - I recommend Martha Stewarts Crafts all-purpose paints!
- Fabric chalk - Be sure to pick a colour that's somewhat close to the colour of your sweater, but not too close that you can't tell the difference between the fabric and the chalk.
- A paintbrush - Fabric paintbrushes would be best, but not mandatory.
- Tide To-Go/Stain remover - For the mistakes you might make...
- Water and palette - The water is to thin out the paint so it isn't rough against your skin when you wear it.
If there are any small embellishments on your sweater, get rid of them!
Stick the cardboard in your sweater to stretch it out and make it easier to draw on.
It would be really handy to have a photo of the finished product as reference to make your Harry Potter crest actually look somewhat like it.
Using the photo as reference, draw the crest using fabric chalk onto the sweater!
Sorry that it's kind of hard to see! The photos of the finished products will help you a bit more!
Squeeze some of the fabric paint in your palette and mix it with some water!
Start going over everything that you drew in chalk with the thinned out black fabric paint.
As you could probably tell, you can see the fabric chalk peeking through. To fade it a bit, soak it in water overnight. The day after, be sure to wring out the water very well and stick it in the dryer. If you're worried about the colour getting messed up in the dryer, let it air dry.
Once that's done, so is your sweater!
I hope you enjoyed this tutorial! Are you a Harry Potter fan? Will you try this out? Please leave a comment down below and share your thoughts!
Thank you for reading!
- J


Wow! Can I commission one? :P
ReplyDeleteHahahaha They're really easy to make, so you should try it out! But if you're serious (which I highly doubt, but whatever), shoot me an email. :)
Delete- Juliana
I love this so much! This was the number one Harry Potter DIY I wanted to do but it looked too difficult. Thank you so much for the tutorial! :) It was really helpful <3
ReplyDeleteAw thank you!!! I'm so, so glad that you found this tutorial helpful! It's all I could ever ask for when I put them out there in the world, that they're going to help someone out there. :)
Delete- Juliana